|
|
||
|---|---|---|
| Pico-PIO-USB | ||
| binaries | ||
| case | ||
| img | ||
| pcb | ||
| schematics | ||
| src | ||
| CMakeLists.txt | ||
| LICENSE | ||
| README.md | ||
| pico_sdk_import.cmake | ||
README.md
DeskHop - Fast Desktop Switching
Did you ever notice how, in the crazy world of tech, there's always that one quirky little project trying to solve a problem so niche that its only competitors might be a left-handed screwdriver and a self-hiding alarm clock?
I use two different computers in my daily workflow and share a single keyboard/mouse pair between them. Trying several USB switching boxes found on Amazon made me realize they all suffer from similar issues - it takes a while to switch, the process is quite clumsy when trying to find the button and frankly, it just doesn't get any better with time.
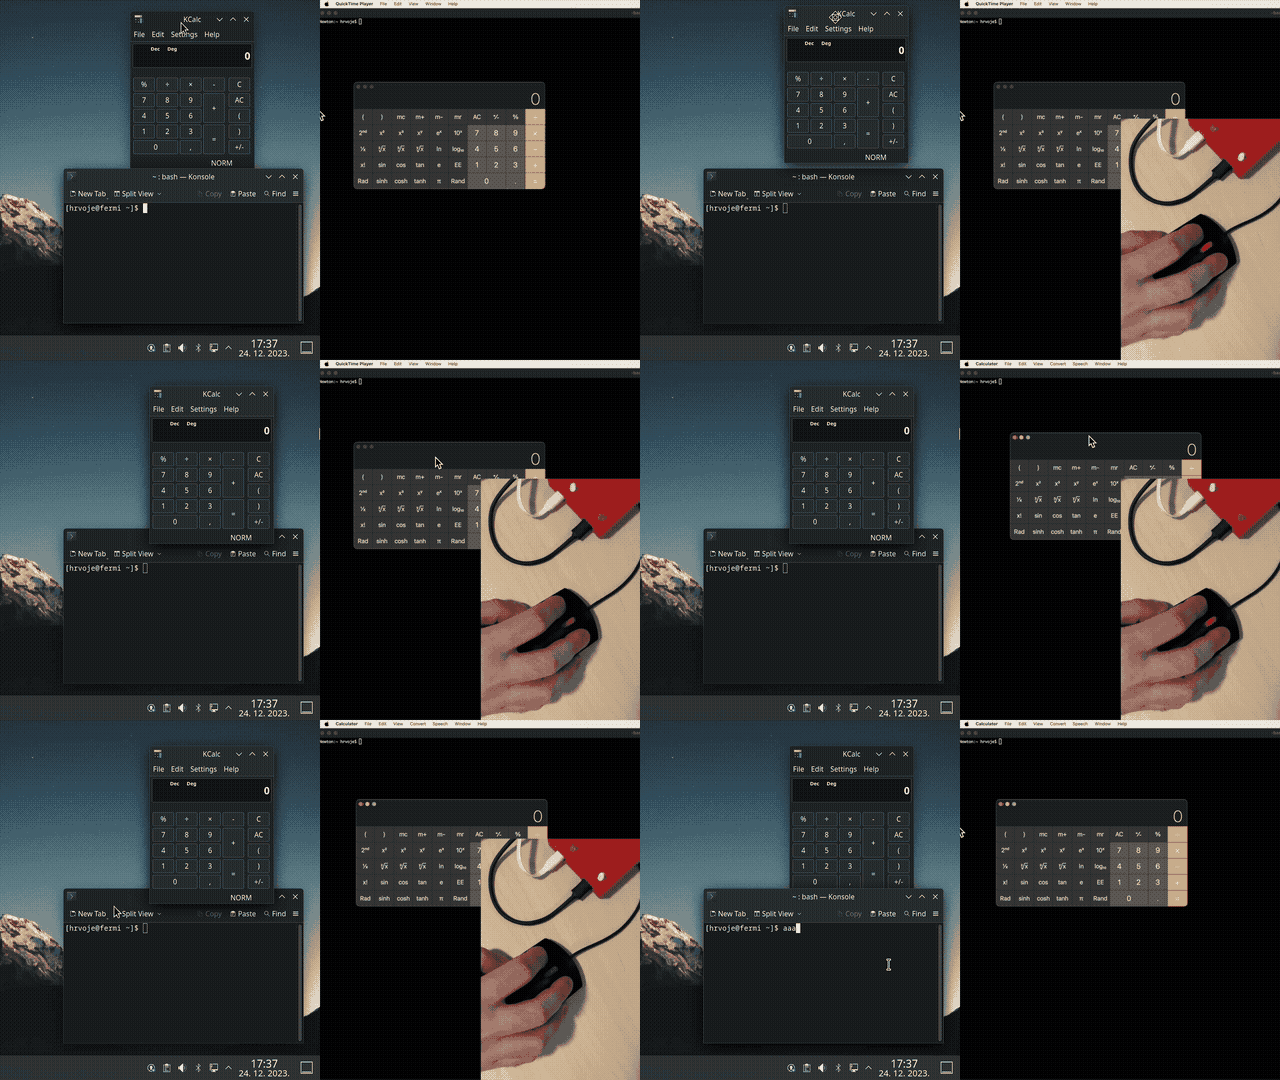
All I wanted was a way to use a keyboard shortcut to quickly switch outputs, paired with the ability to do the same by magically moving the mouse pointer between monitors. This project enables you to do both, even if your computers run different operating systems!
Features
- Completely free and open source
- No noticeable delay when switching
- Simply drag the mouse pointer between computers
- No software installed
- Affordable and obtainable components (<15€)
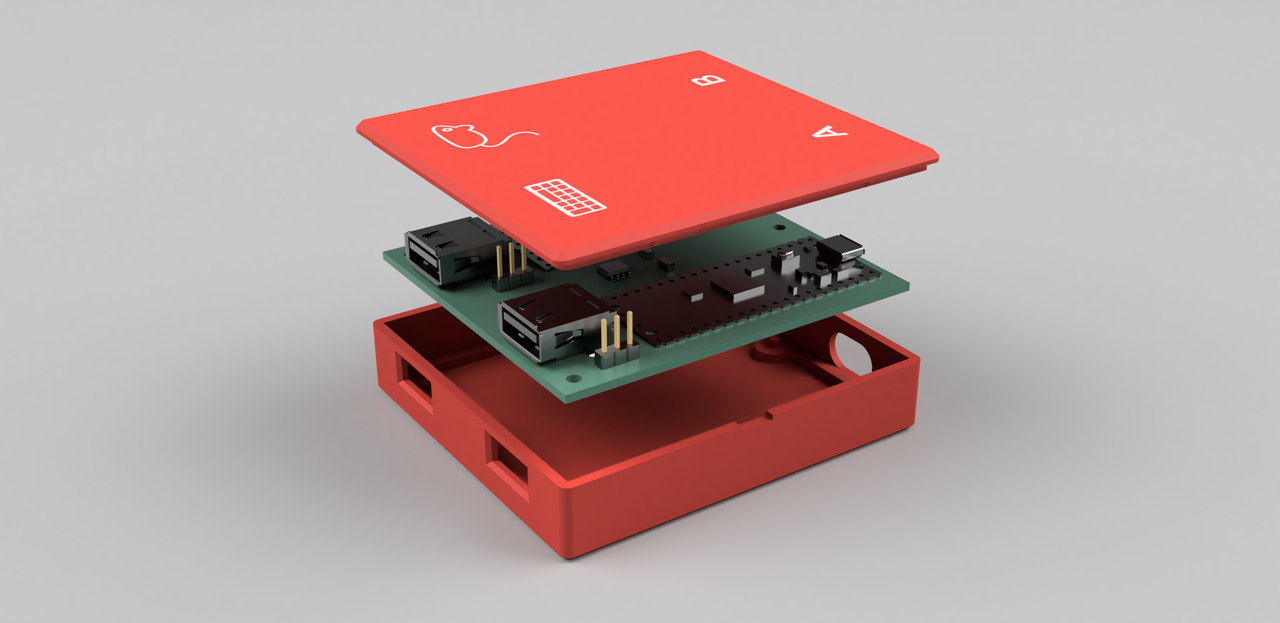
- 3D printable snap-fit case
- Full Galvanic isolation between your outputs
- Works with Linux, macOS and Windows
How it works
The device acts as an intermediary between your keyboard/mouse and the computer, establishing and maintaining connections with both computers at once. Then it chooses where to forward your mouse and keystrokes to, depending on your selection. Keyboard follows the mouse and vice versa, so just dragging the mouse to the other desktop will switch both.
Mouse
To get the mouse cursor to magically jump across, the mouse hid report descriptor was changed to use absolute coordinates and then the mouse reports (that still come in relative movements) accumulate internally, keeping the accurate tally on the position.
When you try to leave the monitor area in the direction of the other monitor, it keeps the Y coordinate and swaps the maximum X for a minimum X, then flips the outputs. This ensures that the cursor seamlessly appears at the same height on the other monitor, enhancing the perception of a smooth transition.
Dragging the mouse from Mac to Linux automatically switches outputs.
The actual switch happens at the very moment when one arrow stops moving and the other one starts.
Keyboard
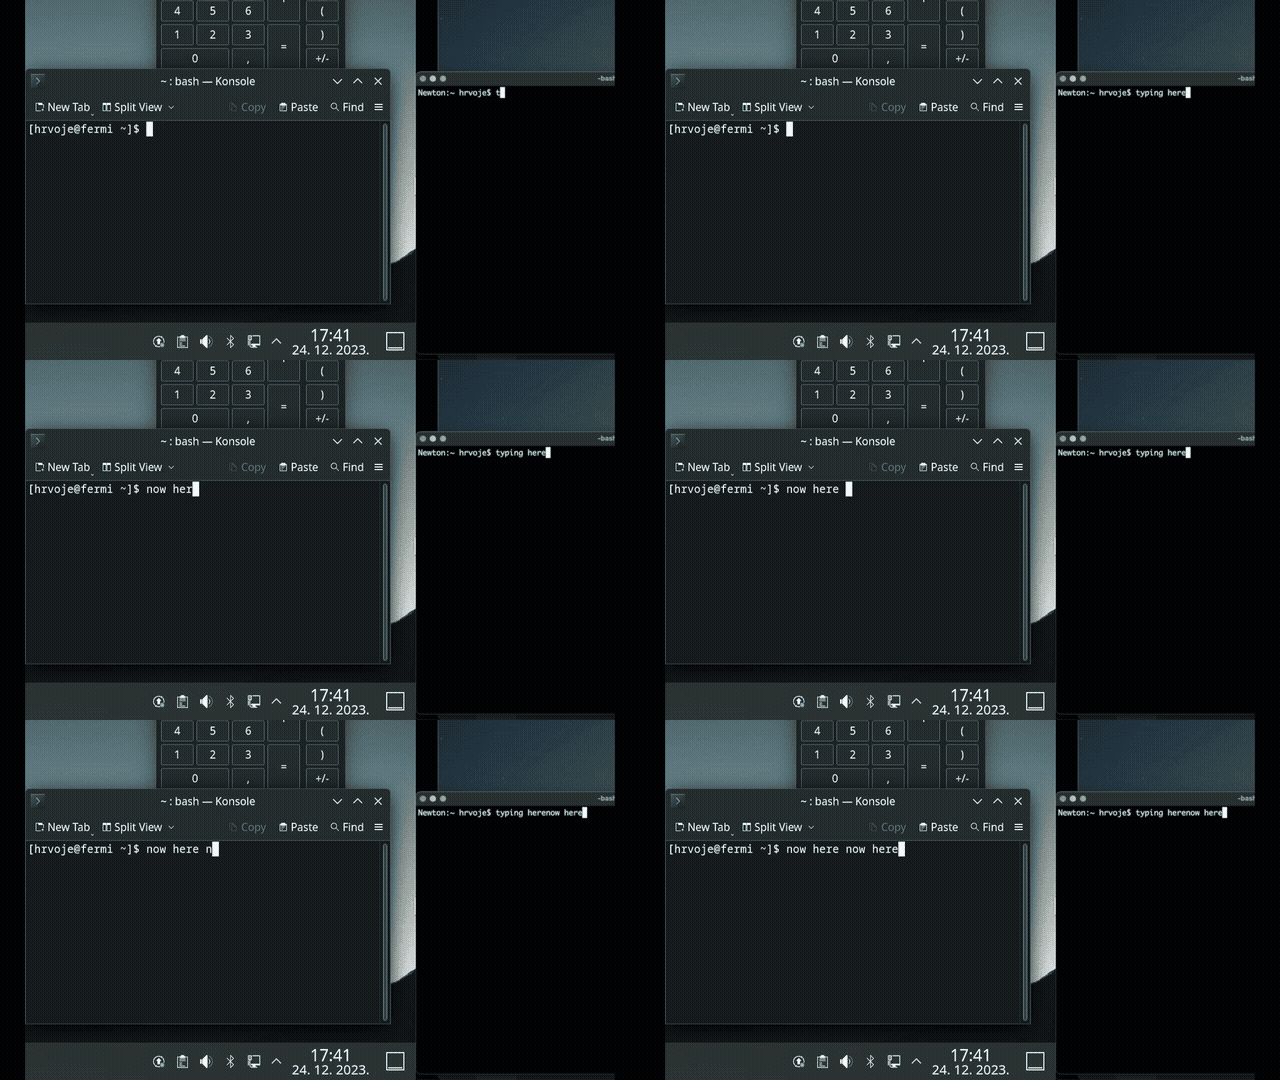
Acting as a USB Host and querying your keyboard periodically, it looks for a preconfigured hotkey in the hid report (usually Caps Lock for me). When found, it will forward all subsequent characters to the other output.
To have a visual indication which output you are using at any given moment, you can repurpose keyboard LEDs and have them provide the necessary feedback.
It also remembers the LED state for each computer, so you can pick up exactly how you left it.
How to build
PICO_BOARD=pico PICO_SDK_PATH=/your/sdk/path cmake -S . -B build
cmake --build build
Using pre-built images
Alternatively, you can use the pre-built images. Take the Pico board that goes to slot A on the PCB and hold the on-board button while connecting the cable.
It should appear as a USB drive on your system. Copy the corresponding board_A.uf2 file there and repeat the same with B.
Upgrading firmware
Option 1 - Open the case, hold the button while connecting each Pico and copy the right uf2 to it.
Option 2 - Switch both Picos to BOOTSEL mode by using a special key combination (hold down all of these keys): Right Shift, P, H, X, Left Shift
This will make the Picos enter the bootloader upgrade mode and act as USB flash drives. Now you can drag-and-drop the .uf2 files to them (you might need to plug in your mouse directly).
Misc features
Ever tried to move that YT video slider to a specific position but your mouse moves too jumpy and suddenly you are moving your hand super-carefully like you're 5 and playing "Operation" all over again?
Holding right ALT while moving the mouse will slow it down considerably, enabling you to get the finer precision work done and still have your mouse moving quickly otherwise.
Hardware
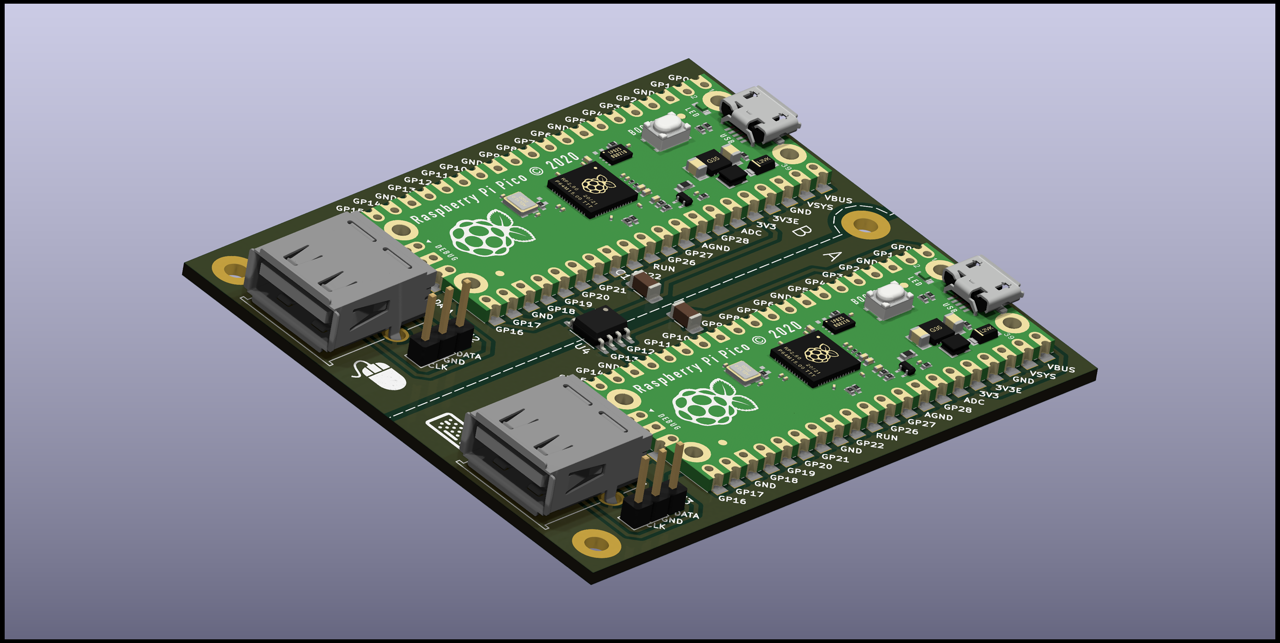
The circuit is based on two Raspberry Pi Pico boards, chosen because they are cheap (4.10 € / pc), can be hand soldered and most suppliers have them in stock.
The Picos are connected using UART and separated by an Analog Devices ADuM1201 dual-channel digital isolator (~3€).
While they normally don't have support for dual USB, thanks to an amazing project where USB is implemented using the programmable IO wizardry found in RP2040, there is support for it to act both as an USB host and device.
PCB
To keep things as simple as possible for DIY builds, the traces were kept on one side and the number of parts kept to a theoretical minimum.
USB D+/D- differential lines should be identical in length, but they are slightly asymmetrical on purpose to counter the length difference on the corresponding GPIO traces PICO PCB itself, so the overall lengths should match.
Zd (differential impedance) is aimed as 90 ohm (managed to get ~107, close enough :)).
The thickness is designed to be 1.6 mm for snap-fit to work as expected.
Planned changes:
- Add 15 ohm resistors for D+ / D- lines
- Add decoupling capacitance near VBUS line on USB-A connector (~100 uF)
- Add an ESD protection device near the USB connector
Case
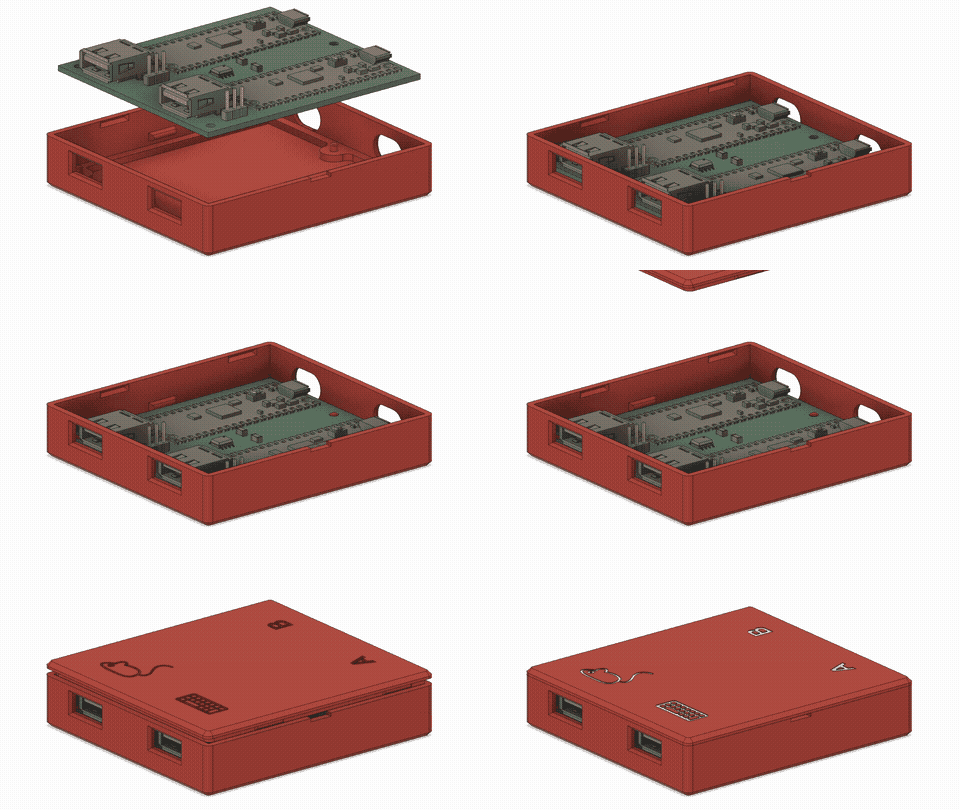
Since I'm not very good with 3d, the case is simple and basic but does the job. It should be easy to print, uses ~33g of filament and takes a couple of hours.
Horizontal PCB movements are countered by pegs sliding through holes and vertical movements by snap-fit lugs on the side - no screws required.
Micro USB connectors on both boards are offset from the side of the case, so slightly larger holes should allow for cables to reach in.
The lid is of a snap-fit design, with a screwdriver slot for opening. The markings on top are recessed and can be finished with e.g. crayons to give better contrast (or simply left as-is).
Bill of materials
| Component | Qty | Unit Price / € | Price / € |
|---|---|---|---|
| Raspberry Pi Pico | 2 | 4.10 | 8.20 |
| ADuM1201BRZ | 1 | 2.59 | 2.59 |
| Cap 1206 SMD 100nF | 2 | 0.09 | 0.18 |
| USB-A PCB conn. | 2 | 0.20 | 0.40 |
| Headers 2.54 1x03 | 2 | 0.08 | 0.16 |
| Total | 11.53 |
USB-A connector can be Molex MX-67643-0910 or a cheaper/budget one that shares the same dimensions.
Additional steps:
-
making the PCB (Gerber provided, JLC does it for a few bucks, choose 1.6 mm thickness)
-
3d printing the case (stl files provided, ~33g filament)
Assembly guide
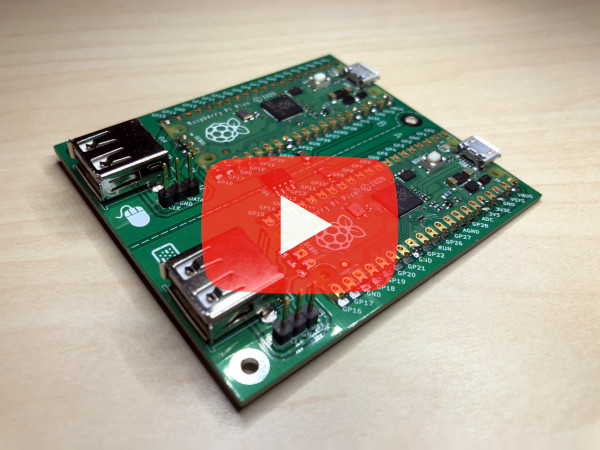
If you have some experience with electronics, you don't need this. However, some of you might not, and in that case this video might help guide you through the process. Please note, after soldering you should clean the flux from the PCB to prevent corrosion.
The standard process to do that is using isopropyl alcohol and an old toothbrush. But guess what? I'm not putting my old toothbrush online, so you'll just have to improvise that part :)
FAQ
- I just have two Picos, can I do without a PCB and isolator?
Sure. Having an isolator is recommended but it should work without it.
- What happens if I have two different resolutions on my monitors?
The mouse movement is done in abstract coordinate space and your computer figures out how that corresponds with the physical screen, so it should just work.
- Where can I buy it?
I'm not selling anything, this is just a personal, non-commercial hobby project.
- When the active screen is changed via the mouse, does the keyboard follow (and vice versa)?
Yes, the idea was to make it behave like it was one single computer.
- Will this work with keyboard/mouse combo dongles, like the Logitech Unifying receiver?
Not with the current version, as it assumes the mouse is plugged in the other port. I'd have to investigate how Logitech Unifying receiver behaves and try to implement support for it. If I get my hands on one, I'll try it.
- Will this work with wireless mice and keyboards that have separate wireless receivers (one for the mouse, another for the keyboard)?
It wasn't tested with those, so surprises are always possible but in theory it should work out of the box.
Software Alternatives
There are several software alternatives you can use if that works in your particular situation.
- Barrier - Free, Open Source
- Input Leap - Free, Open Source
- Synergy - Commercial
Shortcomings
- NOTE: Both computers need to be connected and powered on for this to work (as each board gets powered by the computer it plugs into).
- So far it only supports boot protocol, report protocol parsing under development, so advanced fast-polling mice might not be fully supported at first
- Code needs cleanup, some refactoring etc.
- Occasional bugs and weird behavior.
- Not tested with a wide variety of devices, I don't know how it will work with your hardware.
- Pico-PIO-USB was patched to support controlling keyboard LEDs, normally this would be handled by TinyUSB in host mode.
[Update 29-Dec-2023]
So, what's the deal with all the enthusiasm? I can't believe it - please allow me to thank you all! I've never expected this kind of interest in a simple personal project, so the initial features are pretty basic (just like my cooking skills) and mostly cover my own usecase. Stay tuned for firmware updates that should bring wider device compatibility, more features and less bugs. As this is a hobby project, I appreciate your understanding for being time-constrained and promise to do the best I can.
Planned features:
- Proper TinyUSB host integration
- HID report protocol parsing, not just boot protocol
- Support for unified dongle receivers
- Support for USB hubs and single-sided operation
- Configurable screens
- ... and more!
Disclaimer
I kindly request that anyone attempting to build this project understands and acknowledges that I am not liable for any injuries, damages, or other consequences. Your safety is important, and I encourage you to approach this project carefully, taking necessary precautions and assuming personal responsibility for your well-being throughout the process. Please don't get electrocuted, burned, stressed or angry. Have fun and enjoy!
Happy switchin'!
